The Roblox Twenty One Pilots Concert Experience Event
How to get 6 FREE Items!
September 8th, 2021The Twenty One Pilots Concert Experience event is going until September 19th. During that time there will be several events within the game and outside of the game.
All 6 items are now available for free through this event. Here's a list:
- Bandito Army Jacket - Twenty One Pilots
- Twenty One Pilots Flag
- Car Radio Ski Mask
- Red Blurryface Beanie
- Yellow Bandito Bandana
- Icy Sai
Click HERE for game link.
Read on to learn everything you need to know about The Twenty One Pilots Concert Experience event. Check back frequently for updates as the event unfolds!
Contents:
- Twenty One Pilots Concert Experience Event Schedule
- How to Get the FREE Bandito Army Jacket
- How to Get the FREE Twenty One Pilots Flag
- How to Complete the Ultimate Driving Portal Quest and Get the FREE Car Radio Ski Mask
- How to Complete the World Zero Portal Quest and Get the FREE Red Blurryface Beanie
- How to Complete the Creatures of Sonaria Portal Quest and get the FREE Yellow Bandito Bandana
- How to Get the FREE Icy Sai
Twenty One Pilots Concert Experience Event Schedule
Wednesday, Sept. 8th - Twenty One Pilots Concert Experience event begins
Friday, Sept. 10th - Ultimate Driving Portal opens
Monday, Sept. 13th - World Zero Portal opens
Wednesday, Sept. 15th - Creatures of Sonaria Portal opens
Wednesday, Sept. 15th - Pre-Show at 4 PM PT/7 PM ET
- Repeats hourly through Friday, Sept. 17
Friday, Sept. 17th - Concert at 4 PM PT/7 PM ET
- Repeats hourly through Sunday, Sept. 19
How to Get the FREE Bandito Army Jacket
The Bandito Army Jacket is by far the easiest free item to get in the Twenty One Pilots Concert Experience Event.
All you have to do is visit the Merch Booth, which is right behind you when you enter the game.


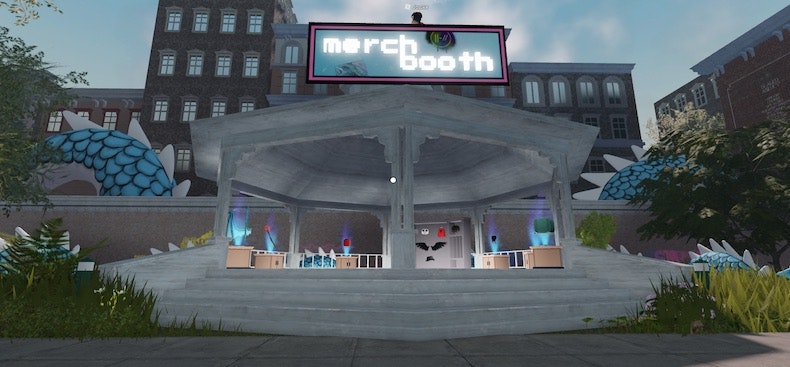
Once you go inside, a menu will pop up full of items to buy for Robux. Scroll down until you see the Bandito Army Jacket and you'll notice that the price is 0 Robux. Score!
How to Get the Twenty One Pilots Flag
In order to get the Twenty One Pilots Flag, along with a badge, you'll need to find all 18 of the floating trident coins.
Most of these are easy to spot as you explore the map, but we've got a complete list of their locations just in case.


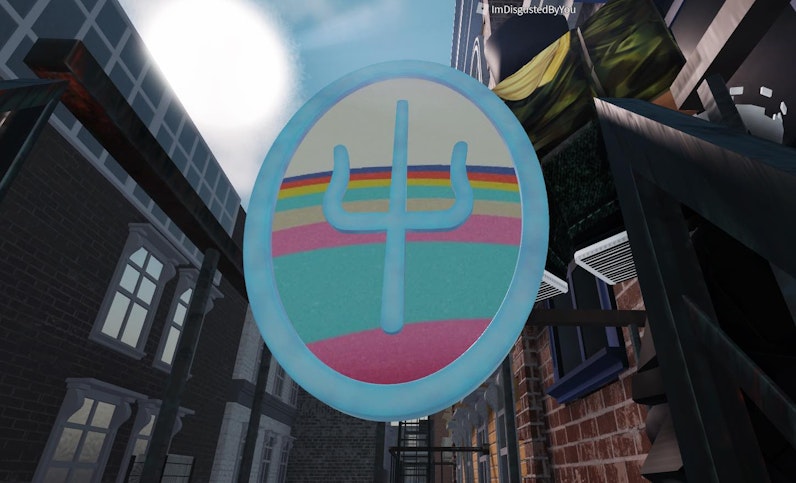
How to Get All 18 Trident Coins
- Starting at the Merch Booth, jump on the blue dragons in the grass around the booth. They will bounce you super high so you can land on the Merch Booth roof, where you will find Coin #1.
- Facing the Merch Booth from the street, look up and to the right. There you will see Coin #2, which you need to bounce on a dragon to get.
- Facing the Merch Booth again, turn to your right and you'll see a white car. Go to the white car and on the other side, between the car and the fence, will be Coin #3.
- Run the way the white car is facing, into an alley. On the left you'll see Coin #4 floating above a garage doorway. This can be tricky to get. The easiest way is to get someone else to stand in front of the doorway so you can jump on top of them, then reach the coin. However, it is possible to jump to it yourself. It just may take quite a few tries.
- Next, head farther into the alleyway, to the Creatures of Sonaria Portal. In the dumpster across from the portal you'll find Coin #5.
- From the dumpster, facing the portal, turn right and you'll see some shop doors and Coin #6 inside.
- Continue in the same direction to exit the alley. Turn left and you'll see a blue car. Head toward it. Notice the blue car has an open door. Inside is Coin #7.
- Facing the fence, turn right to head down another alley. Right in the alley entrance you'll find Coin #8.
- Head farther down the alley until you see a black stairway floating on the left side. Go all the way up the stairs until you find Coin #9.
- Jump off of the stairway and continue down the alley toward the World Zero Portal. Turn right from the portal and head to the exit of the alley, where you'll find Coin #10.
- Head out of the alley toward the red car and turn slightly right. Run diagonally across the street into another alley, to the right of the door that says, "Trench" above it. In this alley you'll find Coin #11 on the right between two dumpsters.
- Head deeper into the alley and find the Ultimate Driving Portal on the left. Just to the right of the portal is Coin #12.
- Facing away from the portal, head farther down the alley and find Coin #13 in a dumpster on the left.
- Keep to the left in the alley to exit toward a blue mailbox with another red car on the other side of the fence. Just at the exit, turn right and jump on the yellow trash cans to reach Coin #14.
- Go to the stop sign you're right next to and turn right to find Coin #15 in the window of a building.
- Turn right at the stop sign and head down the street until you see a building with big red letters that say "RECORDS". Jump on the mailboxes to get up and behind those letters where you'll find Coin #16.
- From that spot behind the letters, face the building, then turn right and run along the ledge. Turn left and jump into the stairwell, then run up the stairs. At the top of all of the stairs you'll find Coin #17.
- This last one is the trickiest coin to find. Jump off of the stairway and head back to the main street. To the right across the intersection you'll see a grey brick building. Head towards it and as you get closer you'll see a green doorway that says "Bakery". Jump up onto the bakery awning, then to the left onto a black stairway. This may take a few tries. Next, head up the stairway but keep an eye out for brown wooden planks. Every time you see a brown wooden plank, that's where you're supposed to go. If you make it to the top of the stairway you've missed a wooden plank somewhere. Eventually you'll make your way around the building and to different stairways until finally you'll find Coin #18.
Once you find all 18 coins you'll be rewarded with the Twenty One Pilots Flag, as well as a badge.
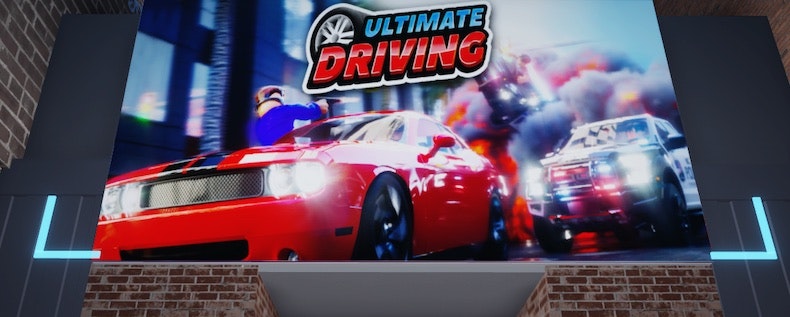
How to Complete the Ultimate Driving Portal Quest and Get the FREE Car Radio Ski Mask
This quest is pretty easy, but it will still take you a bit of time to get because of the driving involved. Once you complete it you'll receive a badge as well as the Car Radio Ski Mask.
To start this quest, you'll first need to be in the game. Here's the link to Ultimate Driving. You can also find the game by going through the Ultimate Driving portal in the Twenty One Pilots Concert Experience.
Once you're in the game, read the instructions below to complete the quest.


How to Start the Ultimate Driving quest for the Twenty One Pilots event:
- From the start menu of Ultimate Driving, be sure to select where it says Twenty One Pilot Event on the right side.
- You'll start in a city area next to a stairway with two dancing people. Talk to the dancers to start the quest.
- Tyler will inform you that he needs you to find three items for him--a car radio, a torch, and a tricycle. He's lending you his tour bus to use while you search.
- You'll immediately be teleported to the tour bus. In the top right corner of the screen you'll see instructions for the quest, along with a yellow arrow and estimated distance from your goal. You'll also see a green waypoint as you travel the map.
- The tour bus is a little bit difficult to drive and doesn't do well off-road. We highly recommend you stick the streets for most of these quests, which means you'll sometimes need to go in a slightly different direction than the waypoint suggests.
How to Find the Car Radio
- As explained above, there will be a waypoint set for you to follow. However, you'll need to veer a bit to the right to stay on the streets rather than driving directly toward the waypoint.
- Once you get to the beach you'll see two tall, white towers. Go to the one that's farther away.
- As you near the tower you'll see a green glow. That's the car radio.
- Once you have the car radio, simply drive back the way you came and give it to Tyler.
How to Find the Torch
- As usual, follow the waypoint until you get to the lighthouse.
- The tour bus does not drive well on sand so we recommend parking it in the grass then running toward the lighthouse on foot.
- On the other side of the hill where the lighthouse is, on the beach near the ocean, you'll find a cave. Enter it.
- There's only one way to go in the cave so just keep following the tunnel until you find the torch.
- Once you find it, head back out the way you came and drive the bus back to Tyler.
How to Find the Tricycle
- Once again, head out following the waypoint, this time to South Beach Airstrip. This is a trickier one to get to--You can't just follow the waypoint.
- Make sure you get on the 76 Highway. You can see what street you're on in the bottom left corner of the screen above the mini map.
- Once you're on the 76 you'll eventually cross a very long bridge. This is why you needed to be on this specific road.
- Take the first exit right before you reach land on the other side of the bridge. After the exit, turn left and follow that road for a very long time. At this point you should be on Highway 12.
- Eventually you'll notice a small dirt road going off to the right. Take that road to drive straight into the airstrip.
- If you miss that right turn, don't worry. Just keep driving and as you get close to the air strip you'll notice there's a chain link fence on the right, keeping you from getting onto the airstrip itself. Simply keep driving until you see a small road on the right. Turn right on the small road and you'll drive right into the airstrip.
- As you pull up to the buildings you'll notice some colorful crates against one of them. The tricycle is hidden behind them, against the building.
- Once you have the tricycle, you'll need to drive back to Tyler one last time.
Once you bring back the last item to Tyler you'll get a badge along with the Car Radio Ski Mask!
How to Complete the World Zero Portal Quest and get the FREE Red Blurryface Beanie
This quest is pretty easy and will probably take 10 minutes or less, depending on your fighting skills. Once you complete it you'll receive a badge as well as the Red Blurryface Beanie.
To start this quest, you'll first need to be in the game. Here's the link to World Zero. You can also find the game by going through the World Zero portal in the Twenty One Pilots Concert Experience.
Once you're in the game, read the instructions below to complete the quest.


How to Start the World Zero quest for the Twenty One Pilots event:
- If you've never played World Zero before then you'll need to create a character when you enter the game. Feel free to design it however you want or if you don't care just go with the default settings. This will make no difference for the quest.
- Once you're in the entrance area of the game, find the Twenty One Pilots Event Portal nearby and go through it to begin the quest.
- When you enter the portal it will tell you that you need to Defeat the 3 Bishops to earn your reward.
How to Defeat the Bishops:
- When you enter the event portal, you'll show up in a dark cave area. Head down the path, killing vultures as you go. If you find food, find it in your inventory and feed it to your pet. This will only help you be stronger when fighting the Bishops.
- After a short ways you'll find a red hooded figure with a huge sword. This is the first Bishop. Watch out--He hits hard!
- The best method for killing this guy is to go in for a strike then quickly run away.
- He will likely hit you even if you run away quickly, but after running around for awhile without getting hit you will heal. This way you can last forever while slowly wearing him down.
- If you see a white circle on the ground, try to get away from it. If he hits you with that move it will take a lot of hit points, plus it will knock you unconscious, giving him the opportunity to land even more hits.
- If you get out of the white circle then after he does his big move he will pause for some time which is a great time for you to sneak up behind him and land a few hits.
- Once you've defeated the first bishop, you'll basically do the same thing again--Continue through the cave killing vultures until you find the second Bishop, then more vultures, then go through a white teleporter to get to the third Bishop.
- The three Bishops are exactly the same so just fight them all the same way.
- Once you defeat the third bishop you'll see a short cut scene with a blue dragon, after which you'll receive a badge along with the Red Blurryface Beanie
How to Complete the Creatures of Sonaria Portal Quest and Get the FREE Yellow Bandito Bandana
This quest is pretty easy in theory but somewhat annoying in practice. It will likely take you half an hour or so, mostly because of travel time. Once you complete it you'll receive a badge as well as the Yellow Bandito Bandana.
To start this quest, you'll first need to be in the game. Here's the link to Creatures of Sonaria. You can also find the game by going through the Creatures of Sonaria portal in the Twenty One Pilots Concert Experience. Note: This game is not supported on all devices. If you usually play on a console you may need to switch to a computer or mobile.
Once you're in the game, read the instructions below to complete the quest.


Starting the Creatures of Sonaria Quest
- If you've never played the game before, you'll have to create a character first. We recommend reading the description of your creature before choosing and making sure it's an herbivore. These ones are much easier to keep alive during your travels.
- Once you're in the actual game, you'll notice a silver sai on the left side of the screen. If you click it, you'll see your Twenty One Pilots quest objectives.
- As you make your way toward achieving these objectives, you will also need to take care of your creature. The creature will likely get hungry, tired, and thirsty, as you progress.
- If you don't satisfy those needs, your creature will eventually die. If you're lucky you may be able to rush through the quest in time, but this is unlikely. It's better just to keep your creature satisfied.
- Also note that you cannot eat a lot at a time. This means if your creature is already starving to death it will be too late to eat. Instead make sure to find food when the hunger meter is just halfway down.
- If your creature is tired, go to actions and choose lay down to rest for a while.
- If your creature is hungry, use the sniff action and follow the green trail to food. Once you're there you'll get instructions on how to eat the item. (On computer it's holding the E key).
- If your creature is thirsty, use the sniff action and follow the blue trail to water. Once you're there you'll get instructions on how to drink. (On computer it's holding the E key).
How to Find All Three Runes
- In order to find the three runes, all you have to do is sniff your way to them. When you saw your quest objectives, it should have told you how to use the sniffing skill. For example, if you're on a computer you would press the H key.
- When you sniff you'll be able to see at least one of the three sai icons in different colors. These represent the three Runes you need to find and will likely be in all different directions.
- Head toward whichever one you see. This may take a while as the map is fairly large.
- If the sai icon disappears, simply sniff again any time and it will come back.
- Once you get to a Rune, just run into it. You don't have to click or anything. A window will pop up letting you know you've found a rune.
- Continue this until you find all three Runes.
- In case you don't want to wander around, you can also use these handy coordinates: Pink Rune: x: 682 y: 1986, Green Rune: x: -2016 y: -198, Red Rune: x: 2190 y: 320.
How to Find the Portal
- Once you've found all three Runes you'll need to find the Portal to get to the puzzle room.
- You find this the same way you found the Runes: Just sniff and look around until you see a yellow sai icon. That's where the portal is.
- If you're very far away from the portal, you will not be able to see the icon. Simply travel around the map sniffing until you see it.
- Head on over and go through it. In case you'd rather just use coordinates, they are: x: -35 y: 320.
- Once you go through the portal you'll be ready for the final section of this quest.
How to Find the Six Hidden Objects
- Once you've gotten to the puzzle room you need to find the six hidden objects.
- Once again, these objects are represented by sai icons. However, they don't glow and you can't sniff them out.
- Instead they are likely to blend in with the terrance. Still, they should be pretty easy to see as you explore the area, just sai icons with circles around them.
- When you find one just touch it and you'll get a notification that you've found one of the hidden objects.
- It's a pretty small area so you should be able to find them pretty easily.
- In case you'd rather just use coordinates for each object, here they are: Object #1: x: 642 y: 4491, Object #2: x: 608 y: 4494, Object #3: x: 535 y: 4452, Object #4: x: 553 y: 4417, Object #5: x: 593 y: 4376, Object #6: x: 636 y: 4387
- Once you find all six of the hidden objects you will automatically receive the Yellow Bandito Bandana in your inventory.
How to Get the FREE Icy Sai
Before you can get the Icy Sai you will have to complete each of the portal quests in Ultimate Driving, World Zero, and Creatures of Sonaria. Once you've done this, head back to the Twenty One Pilots Concert Experience. That's it. You will receive a badge and the Icy Sai. Yay!